All About Fonts & Text in Cricut Design Space

Cliff Notes Version:
- Download your fonts from a site like Dafont.com. They will almost always download as a .zip file
- Unzip them. Use a program like WInzip or 7-Zip.
- Copy the OTF or TTF file to the fonts folder on your computer (for ipad users, there's an app called AnyFont for adding new fonts. )
- Open Design Space, add a text box and find your font under "system fonts". Sometimes, rarely, you will have to restart your computer for the fonts to show up. Or possibly just close the browser and open a new one.
The Long, Wordy, Step By Step, Instructions:
This is the most common newbie question "I downloaded fonts from Dafont, but I can't open them in Design space, what am I doing wrong?"
You don't open fonts in design space. You use fonts in design space, but only fonts that are already installed on your device. (Or fonts that are already included in design space)
If you download a font on your laptop, it will not show up in design space on your tablet or phone, unless you also install the font on that tablet or phone.
For windows computers - usually you just copy the font (just the font - be sure to unzip the file first) to the font folder on your computer - more details & screenshots below.
For Ipads - Use an app called Any Font to install new fonts
For Android - The android app for design space is so useless that it's not worth adding new fonts just for this.. but it's simple to add new fonts on android, I just added them to the fonts folder when I was using them in phonto.
Where to Download Free Fonts:
The answer you will most commonly receive is Dafont. There's an amazing selection there, and you can search by types. There is a similarly named website that adds an S - that one is reputed to be full of viruses. Don't confuse the two, and use a decent antivirus program on your computer.
My favorite places for free fonts:

A cheat sheet of my favorite fonts, and where to download them
How Do I Install A New Font?
There is a great, detailed, article here that will help with both Mac and various windows versions.
https://creativemarket.com/blog/how-to-install-your-new-font-in-a-few-easy-steps
I use Windows 10, and it's extremely simple. Unzip, copy the file to the windows font file. Done. You may need to close all browsers, then reopen them, for the font to appear in design space. In rare instances, you may need to restart your computer for them to show up.
So first you download the fonts. Then you unzip. Then you Install.
Unzipping software is built into windows, you can simply right click and choose "extract all".
There is a great little free program called 7 Zip (similar to winzip, but winzip is not free) that will make it faster - you can select all of the zip files at once, right click, choose 7 zip, then choose extract here, and it will extract them all at once, not one by one)
Once the files are unzipped, it will look something like this:

In other words, a bit of a mess. There are png files, text files, true type fonts, open type fonts.... Often the PNG files have examples of how to use the fonts. In this example, the Stea font has PNG files showing the glyphs you can add using different number keys. the text files frequently have licensing information - details on how you can legally use the fonts, which could be important if you are selling items using those fonts.
But for me, I like to keep this pretty simple. I don't sell items, so I don't much care about the licensing. (I can always look it up later if needed) If I need more information on how to find the glyphs, I'll use a character map (I'll cover that in a bit) or google it later - storing the files would just add clutter I'm unlikely to find when I need it. I sort this folder by type, and delete everything except the true type and open type fonts.
That leaves me with a more manageable mess. But this is STILL more than I need.

Now I sort by name, and I delete all the duplicates, keeping only the open type fonts. All of the software I use (Design space, word, publisher, etc) gives me the option to make a font bold or italic, so I do not need the bold or italic version of the font. I just need one file. Some of the fonts only have a true type version, not an open type, that's fine. If there are two options, I choose open type. There is a LOT of information here about the differences between Open Type and True Type, but this is the excerpt that clarified it for me:
" An OpenType font is a single file, which can be used on both Macintosh and Windows platforms without conversion. OpenType fonts have many advantages over previous font formats because they contain more glyphs, support more languages (OpenType uses the Unicode standard for character encoding,) and support rich typographic features such as small caps, old style figures, and ligatures — all in a single font."
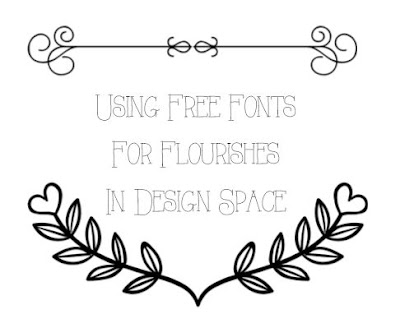
Glyphs. Again, we'll come back to those.. but eventually, in cricut design, you are likely to care about glyphs. Because they are the fun swirls and flourishes you can add to your text.

TIP - if you are not seeing the file types off the the right here, make sure you choose "Details" under the view option.
Ok, so so far we have downloaded the fonts, unzipped them, deleted all the extra clutter... now we need to install them. Which, on windows, just means placing them in the font folder in Windows.
Fonts used to be under c:windows/fonts, but on my windows 10, they are now accessed through the control panel:

I use this folder often enough, I found it beneficial to create a shortcut and place it on my desktop. Once you have the folder open, simply click on the folder with the A (to the left of the word control panel, in the bar at the top - as shown in the photo above) and drag it to your desktop. It will create a shortcut for you.

Open the folder, copy the font files in. Close your browsers, Re-open them, and you should be all set. In some rare cases, you may need to restart your computer.
Cloud Back Up
Now, especially if you have paid for fonts, like that Samantha font (which is not cheap, but which most cricut users eventually cave and pay for, because it's just so pretty) copy those files into cloud storage!!! This was a lifesaver for me this week. My laptop screen broke, and although I will most likely replace the screen, in the meantime I bought a new laptop. All of my favorite fonts, including Samantha, are in a folder in Dropbox, so all I had to do was download them and copy them into the font folder on my new laptop. Quick and easy!
Ok, so now we have the fonts installed - how do we USE them?
First, go to https://wordmark.it/
This site is amazing. Type any phrase in the text box, and it will show it to you in every font installed on your computer. This saves so much time when choosing fonts!

Choose the text tool in Design space, type your text.
On the top left, there will be a font box, click on it to change your font:
(the font option, to the left of style, will only appear if your text box is selected. If it's not there, try clicking on your text)


Next -
First, go to https://wordmark.it/
This site is amazing. Type any phrase in the text box, and it will show it to you in every font installed on your computer. This saves so much time when choosing fonts!

Choose the text tool in Design space, type your text.
On the top left, there will be a font box, click on it to change your font:
(the font option, to the left of style, will only appear if your text box is selected. If it's not there, try clicking on your text)

You can sort fonts by ALL, SYSTEM, Or CRICUT.
Personally, I always go straight to the system tab. Jsut becasue a Cricut font is free now does not mean it will be free by the time I finish the project, or the next time I make it, so I find it less frustrating to just work with system fonts that I know are always free for me to use.

Next -


Comments
Post a Comment