Cricut Easter Baskets
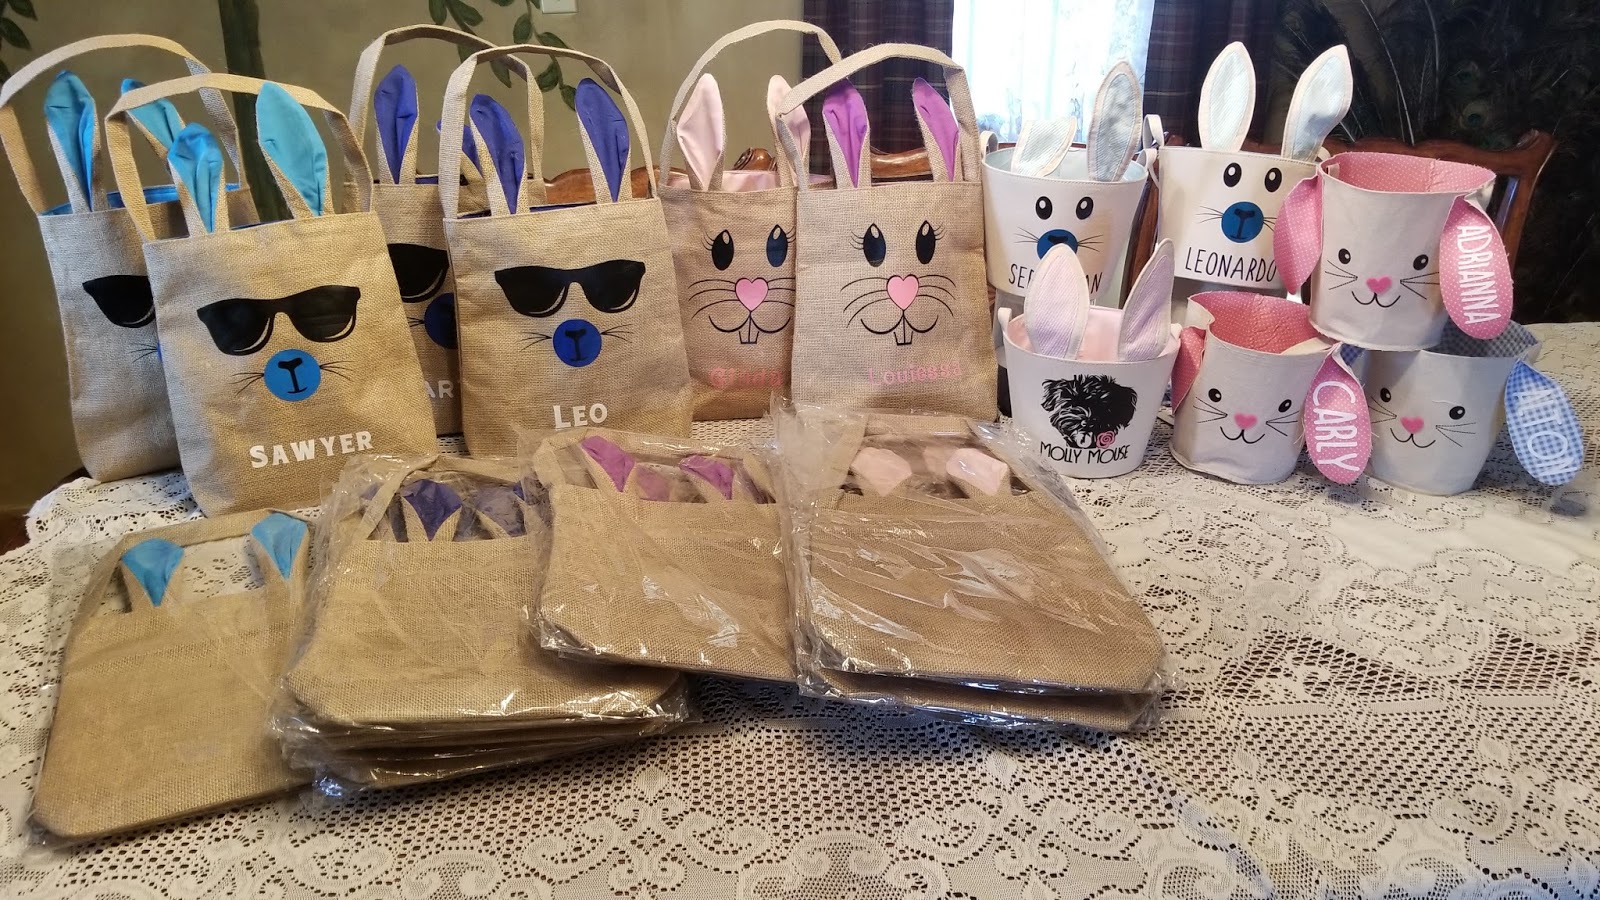
- Baskets are from the Dollar Tree, Target, & DH Gate. Details are below, for each.
- Designs are from all over. I've started this post with a list of places to find free bunny faces, then later in the post I describe each design I used and where I got the elements for it.
- I used a regular iron for all of these. It's what I always use, I never have any problem using an iron. I use a silicone baking sheet inside (or behind) items when Ironing on my designs, I think it helps.
- Siser Easyweed HTV. I buy it on Amazon, with prime free shipping, it's always the cheapest that way, for me.

Free Bunny Face SVG Files:
Clipart - not an svg - but with teeth -
Misc animal faces
Llama faces (for the sunglasses) http://caluyadesign.com/free-llama-faces-svg.html
Fonts I liked for the names: Pharmacy, Twinable, Messy Marker, Moonlight, Chuck Noon


Bought at DhGate
$3.70 a bag, free shipping
Took about 3 weeks to receive them
Ironing on them:
These bags were a little hard to work with. NOT horrible. Just harder than a t-shirt. I would put all my layers on, peel off the layers that overlapped, and then I'd press for a regular iron, 10 seconds in each spot, WITHOUT parchment paper. Then I'd add the second layer (the colored circle ) and USING parchment paper, press again. Add the last layer (the nose & mouth) and cover with parchment paper and press again.

I used the silicone baking sheet inside the bags, as I do with most items, but because of the way the burlap and fabric are layered here, I'm not sure how much it helped. I used it anyway. :-)
Then I'd typically go over the name again - the seams and layers at the bottom made it a little more difficult to get the good pressure on the letters.

Dollar Tree Baskets:
These are sold out online, so it's just luck if you can still find any in the stores. For $1, these are by far the quickest and easiest and cheapest to make! Big Lots has similar baskets, but not nearly as cheap.
Ironing Them On -
You have 4 inches in length to work with on these ears.
I chose the font Moonlight - one of my current faves. As much as I love beautiful scripty fonts, when making things for young children, I like to keep the letters clear and readable so they easily recognize their own name.

Right inside the door, in the "Dollar Spot" aisles. (Why is this called Dollar Spot? Almost nothing there is just $1....) They cost $3, and are sturdy - with a plastic bucket inside the layers of canvas material. The ears have wire in them.
Five Below has similar buckets, just a bit larger, with a bunny silhouette already on them, for $5 each.
Ironing On Them:
This is the only time I have used my iron more like an iron than a "press" for htv. Because of the curve of the bucket, I kind of ran the iron around over the design. It attached quickly and easily - the htv seems to like this material! I didn't put anything inside of the buckets, just my hand. I kind of held the bucket in the air with one hand, and moved the iron around the design with my other hand. It sounds difficult, I know, but this was actually much easier than the burlap bags.
The Designs:

I used the llama face with sunglasses from Caluya design, ungrouped, deleted the ears.
Selected both areas on the glasses, and sliced, so the cut outs are cut out, not layered.
Changed the circle behind the nose to pale blue
I added the whiskers from the printable cuttable creatables face
Font is chuck noon.
Because I have a LOT of black scraps, rather than fuss with how to place everything to use up scraps, I just changed the whiskers & nose, sunglasses, and letters all to different colors and cut each one. I put black on the mat each time, but because the software thought I was using different colors, it automatically prompted me to put in a new mat for each item. It was a little more (but not much!) time consuming to do it this way, but I did almost all of these with just my scraps - and I found it quicker to put in a new mat than any other option.

This is the face I used for the girls burlap bags. It was in my svg files names BunnyFace.svg - but there is no information in the properties for me to know where i downloaded it from. I downloaded it in November of 2017... The links above give similar faces, but if anyone knows where I got this particular svg (I'm positive it was free) I'd love to link to it.
The font I used for the girls burlap bags was DK Jambo.

Molly's basket was made with a photo of her. I used graphics software to convert it to an svg, for Christmas ornaments last year. For this, I simply had to make the graphic larger. Font is Moonlight.


Comments
Post a Comment